


There is one canon that most 3D printer users go through. You just picked out a filament straight out of the box to print it. However, it ends up being this stringing blob of print along with popping sounds coming from your 3D printer and a lot of others.
If you have encountered any of these issues, then chances are that you have encountered a moisture-interfered filament. Moisture is one of the leading causes of prints failing and can also destroy your nozzle or cause other issues.
This is one of the main reasons why we must use filament drying methods to ensure that moisture is out of the equation and that your 3D prints are great. With so many different filament drying methods, which one is the best?
Today, we are covering all filament drying methods compared with the pros, cons, and effectiveness of each of them. Moreover, we will also discuss why using a filament dryer is the best possible option.
Why Should You Dry Filaments in the First Place?
Filament drying is one of the most common methods of ensuring that your 3D prints are professional, nice, and great. But before getting into the methods, let’s talk about why you need to dry filament in the first place.
Most 3D printing filaments are hygroscopic. The term hygroscopic can be explained as something that can absorb moisture from the air. With some filaments like PETG, just a few hours of exposure is enough to make the filament humid, and can make the quality worsen.
Moisture-affected filaments can cause popping or crackling sounds, stringing issues, layer adhesion issues, and even surface bubbles that make the print look weird or unusual. In order to eliminate these issues, the absorbed water must be avoided in the first place but if your filaments are affected by moisture, then drying techniques must be used in order to make your prints look better.
Here are some of the methods you can use for drying filaments.
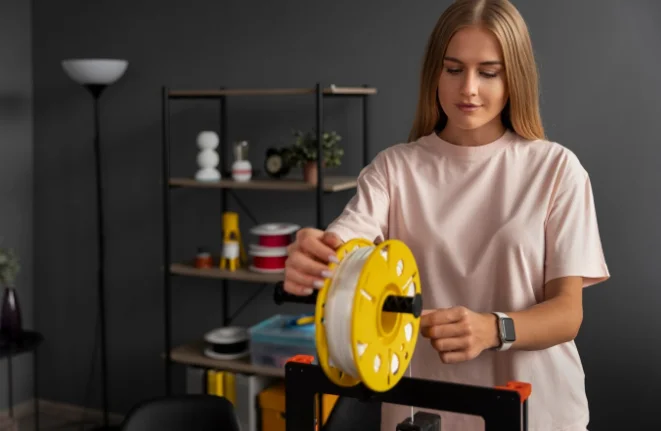
Using a Filament Dryer
Filament dryer is a dedicated device made for 3D printers’ filaments to be dried at safe, effective, and specific temperature, so you can print the best possible prints without having to worry about moisture. It also includes adding in a good airflow so the filaments don’t get too hot while failing.
One of the best examples of a filament dryer is the Chitu Systems FilaPartner E1. This filament comes with numerous features, including digital temperature and humidity control, and what’s even more impressive is that it allows you to dry multiple filaments simultaneously.
To be specific, you can print four filaments with its two-chamber design. What’s even more interesting is that you can also continue your printing process while the filaments are being dried in the chamber . Here are some of the pros and cons of using a filament dryer:
Pros
- Best for drying filaments like PLA, PETG, TPU, Nylon, and more! Anything up to 70 degrees would benefit from it.
- Maintains consistent heat without failing at all.
- You can leave your filaments for drying overnight, and it will work effectively.
- Most filament dryers have a built-in hygrometer and temperature control.
- Reliable compared to other methods.
- You can store your filaments safely without external interference.
Cons
- The cost might be higher than some DIY methods.
If you’re someone who wants maximum reliability and perfect drying, then you should choose a dedicated filament dryer. However, you can even use it as a filament storage box if drying isn’t needed, making it a multipurpose accessory.
Food Dehydrator
If you’re looking for a budget-friendly drying experience, then even a food dehydrator can be effective in drying filaments. If you can do some DIY on a dehydrator, it can be quite useful. It will work well if the dehydrator reaches the temperatures that are ideal for drying.
For example, you should know the exact temperature at which a filament can be printed. Then, set the food dehydrator to that temperature and you’re good to go. Here are some pros and cons of a food dehydrator for filament drying purposes.
Pros
- Affordable and effective for drying filaments.
- Can handle multiple spools.
- Has good airflow and gentle heat.
Cons
- Lack precise control if you don’t modify it.
- It is not the best for filament drying if you’re not a technical person.
- It can have inconsistent temperatures across different areas.
Overall, a food dehydrator is a good contender for being a filament dryer, but it must undergo some minor modifications.
Using an Oven
If you already use an oven, then you should know that it can be used as a filament dryer as well. Baking is quite a common activity in our homes, and your filaments can kick out moisture. However, it also comes with many risks that can ultimately destroy your filaments.
That is because most overs are a bit inaccurate at lower temperatures, which can be such an issue when drying filaments.
Here are some pros and cons of using an oven.
Pros
- Ovens are commonly available in most homes, so no extra investment is needed.
- Can reach higher temperatures for many filaments.
- There is no learning curve involved.
Cons
- Overheating and melting may occur because temperatures can reach such high levels.
- Not safe to use when you’re cooking food.
- There is no airflow control, so the whole drying process is manual.
Final Verdict
Filament drying is one of the best techniques to ensure that your filaments don’t get moisture, and the results are not bad. So, the best way to dry your filaments is by using a filament dryer. But the other methods are good only if you’re an experienced 3D printer hobbyist or professional.Finally, if you’re looking for more 3D printing accessories, you should check Chitu Systems and their catalog of amazing accessories.